Recording an online meeting can be a straightforward process that ensures you capture important discussions and decisions made during the meeting. But before you get started, you need to clarify the following:
- Understand the purpose of the recording.
- Identify the platform you’ll be using.
- Get permission prior hitting the record button.
A well-recorded online meeting can maximize communication and productivity.
KEY TAKEAWAYS
- Proper preparation sets the foundation for an effective recorded meeting.
- Active management during the meeting ensures a complete and clear recording.
- Prompt sharing of the recording post-meeting reinforces communication and follow-up.
How to Record an Online Meeting For Remote Teams
With technology today, we can easily record hour long meetings, and some even offer up to 24 hours recording, the online meeting software we choose to host the online meeting is key to productive online meeting. The quality of the video, the sound quality and the options for engagement, all plays a part in making the online meeting productive.
To make it easier for you to follow on getting started in recording online meeting, we’ve break it down into 4 parts:
- Part 1: Preparing for the Online Meeting
- Part 2: Starting the Recording
- Part 3: During the Meeting
- Part 4: After the Meeting
Part 1: Preparing for the Online Meeting (Pre-Meeting)

Before diving into your online meeting, it’s crucial to set the stage for a seamless experience. The right tools and setup can make all the difference.
Choosing the Right Software
Your first step is selecting a robust video conferencing platform suited to your meeting’s size and purpose.
- For large-scale enterprise needs, consider options like Zoom, Microsoft Teams, or Google Meet, known for their reliability and array of features.
- For organizing one-on-one meetings, investigate software like Zoho Meeting or GoTo Meeting, which may offer a more streamlined experience.
Ensure the chosen software meets your privacy and interaction requirements; a list of enterprise meeting software may guide you in the right direction.
Setting Up Your Equipment
A successful meeting heavily relies on good quality audio and visuals.
- Start by testing your computer’s internet connection to avoid lags or drops during the meeting.
- Next, check your microphone and camera to ensure they are functioning well; the crisper the audio and video, the more effective the communication.
Keep your equipment setup simple but effective: a quiet room with good lighting can drastically improve your on-screen presence.
For more intimate settings, consider tools highlighted in a selection of one-on-one meeting software, which can elevate the personal connection in your meetings.
Part 2: Starting the Recording
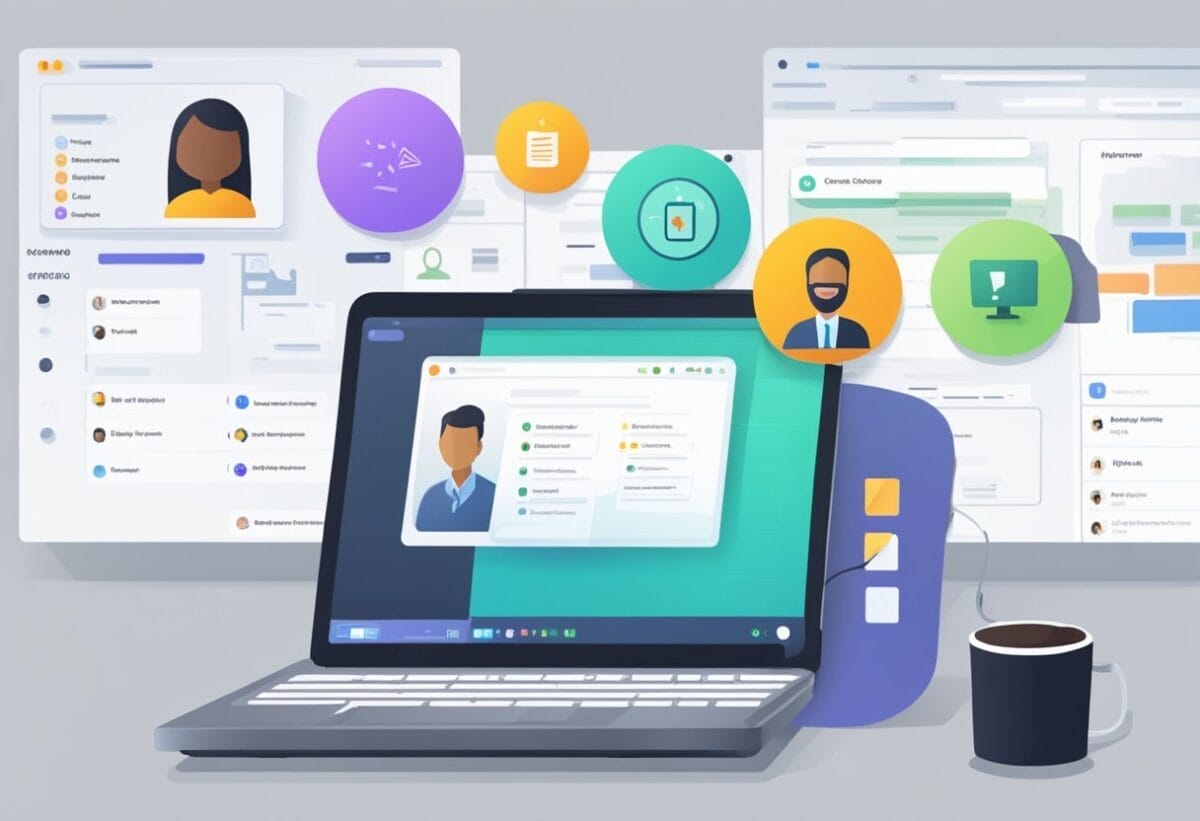
Before you hit ‘record’, make sure you’re familiar with your platform’s process and have the necessary permissions to capture your meeting. Taking these initial steps ensures that your meeting recordings will be smooth and hassle-free.
Initiating Recording in Various Platforms
General meetings software, simply click on the ‘Record’ button found at either the bottom toolbar or at the top toolbar.
You’ll have the choice to save the recording locally on your device or to the Cloud. However for most cloud recording, a Pro account or higher is required.
Here’s a quick on how to get started for various platforms:
- Zoom Meetings: To start recording a Zoom meeting, simply click on the ‘Record’ button found at the bottom toolbar.
- Skype: Select the ‘…’ more options button during your call and choose ‘Start recording’.
- Microsoft Teams: Click the ‘Start recording’ option in the meeting controls.
Each platform will visually indicate when recording is active, usually with a red dot or a timer on the screen.
Ensuring Proper Permissions
Before recording, verify that you have recording permission from the host if you’re not leading the meeting.
Permissions can often be managed in the meeting settings by the host.
- Zoom Meetings: The host needs to allow participants to record in the settings.
- Skype and Teams: Only the call initiator or an admin has the ability to start recordings.
Note: Always inform participants before beginning the recording for courtesy and compliance with privacy guidelines.
Part 3: During the Meeting
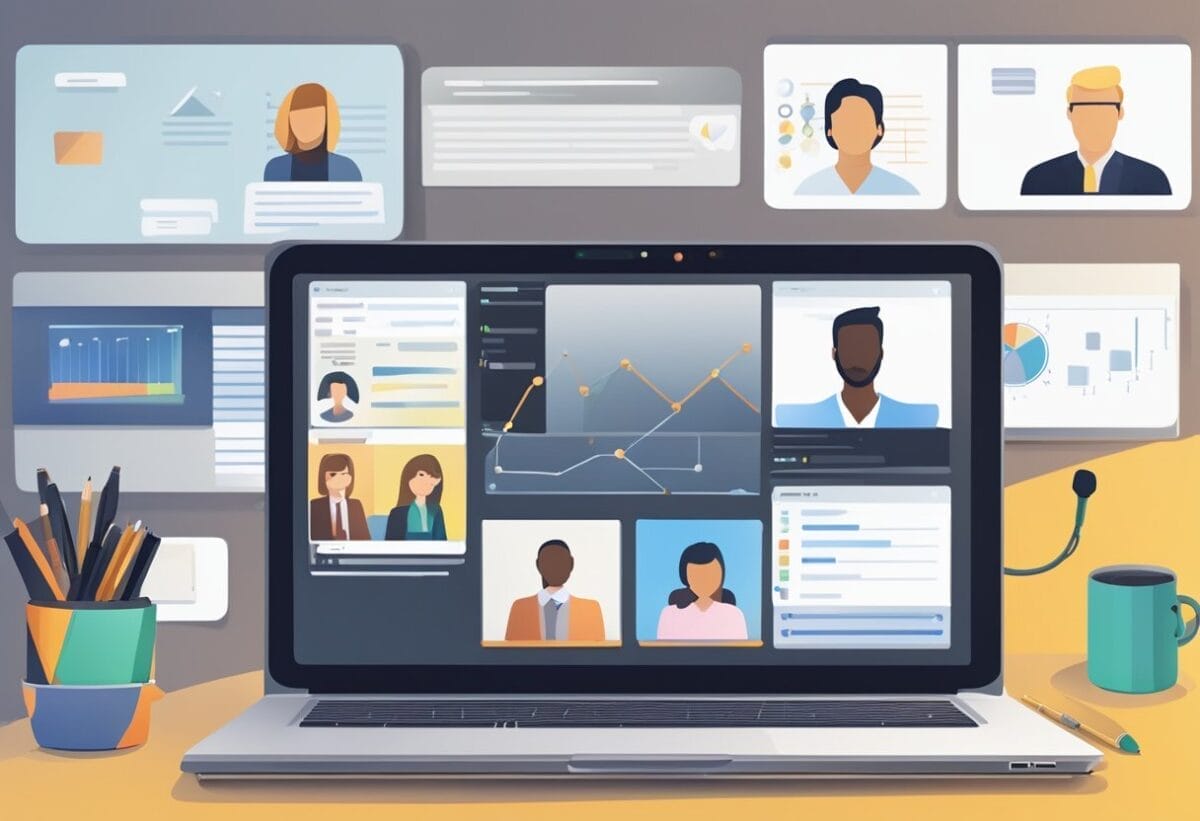
Recording an online meeting effectively is key to capturing important discussions and decisions. You have the power to keep a detailed record while keeping engagement high.
Managing Recording Controls
When you start the meeting, ensure the recording feature is active. Your role as the host includes knowing how to manage the recording.
Be familiar with how to pause and stop the recording. This control is critical when dealing with sensitive content or when a break is necessary.
Here’s a quick reference guide:
- Start Recording: As soon as the meeting begins, click the record button.
- Pause/Resume: Should a need arise, temporarily stop the recording, and resume when ready.
- Stop Recording: Once the meeting concludes or at a natural endpoint, end the recording.
Remember, effective management of these controls maintains a professional recording without missing vital information.
Maximizing Meeting Engagement
Engagement during your online meeting is as vital as the content itself.
Keep team members involved by using screen sharing, whiteboards, and interactive elements.
These techniques ensure the meeting remains dynamic and participative.
- Screen Sharing: Share your screen to make points visually clear.
- Whiteboards: Use whiteboards for collaborative brainstorming or illustration.
- Engage Participants: Prompt team members for input regularly to keep attention focused.
By keeping participants engaged, you’ll foster a collaborative environment that maximizes the productivity of your meeting.
Keep the spirit of teamwork alive, and you’ll see the results in the commitment and the quality of interaction among your team members.
Part 4: After the Meeting (Post-Meeting)

Once your online meeting concludes, it’s vital to handle the recordings effectively. This ensures that your team can revisit the discussions and maintain a record of decisions made.
Accessing and Sharing Recorded Content
After you stop recording an online meeting, the file typically processes before becoming available.
- For cloud recordings, you’ll receive a notification or email with a clickable link to access the file.
- If you conducted a local recording, it’s saved directly to your device, often in a specified folder.
To share this content, you’ll only need a few simple step:
- Upload it to a service like OneDrive or another cloud storage solution.
- Next, you can distribute access by sending your team clickable links through your chosen email service providers.
Ensure you manage access rights carefully to keep your shared content secure.
Organizing and Storing Recordings
Effective organization of your meeting recordings is key to maximizing their usefulness.
- Create a systematic folder structure within your cloud service to categorize recordings by date or project. E.g. “ABC Software Meeting” or “Meeting XX Jun 20XX”
- Then, clearly label each file so you can easily reference them later. E.g. “Agile Kickoff Meeting – 19 Jun 20XX”
For long-term storage, consider integrating your recordings into your collaboration tools. Some collaboration tools offer built-in features for organizing and searching recordings.
Also, maintain regular backups to avoid data loss.
Finally, set up permissions to control who can view or edit these recordings.
How to Record Meeting for Popular Platforms?
As we understand that not everyone finds it easy to get started in using the various features offered by the online meeting software. We’ve created a simple guide on the step-by-step process for recording online meetings for the most popular meeting platforms.
Guide to Recording Meeting in Teams (Microsoft Teams)
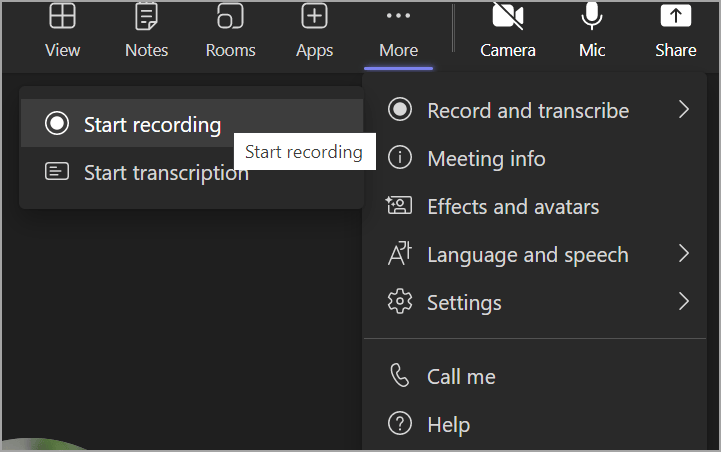
To record a meeting in Microsoft Teams, follow these steps:
- During the meeting, look for the meeting controls bar at the top of the screen.
- Click on the ellipsis icon (three horizontal dots) to open the More actions menu.
- Select “Start recording” from the menu options.
- A notification will appear to all participants, indicating that the meeting is being recorded.
- To end the recording, click on the ellipsis icon again and choose “Stop recording.” Alternatively, end the meeting, and the recording will automatically stop.
- Once the meeting ends, Microsoft Teams will process the recording. You can access the recording in the chat history of the meeting or in the Microsoft Stream application.
Guide to Recording Meeting in Google Meet (Google Suite)
To record a meeting using Google Meet, follow these steps:
- Start or Join a Meeting: Open Google Meet and start or join a meeting.
- Initiate Recording: Once the meeting has started, click on the “Activities” icon at the bottom right corner of the screen.
- Start Recording: In the Activities menu, select “Record meeting.” A notification will appear for all participants indicating that the meeting is being recorded.
- End Meeting and Stop Recording: When the meeting is over, click on the “End call” button. This will automatically stop the recording. The recording will be saved to the organizer’s Google Drive within 24 hours.
Guide to Recording Meeting on Zoom
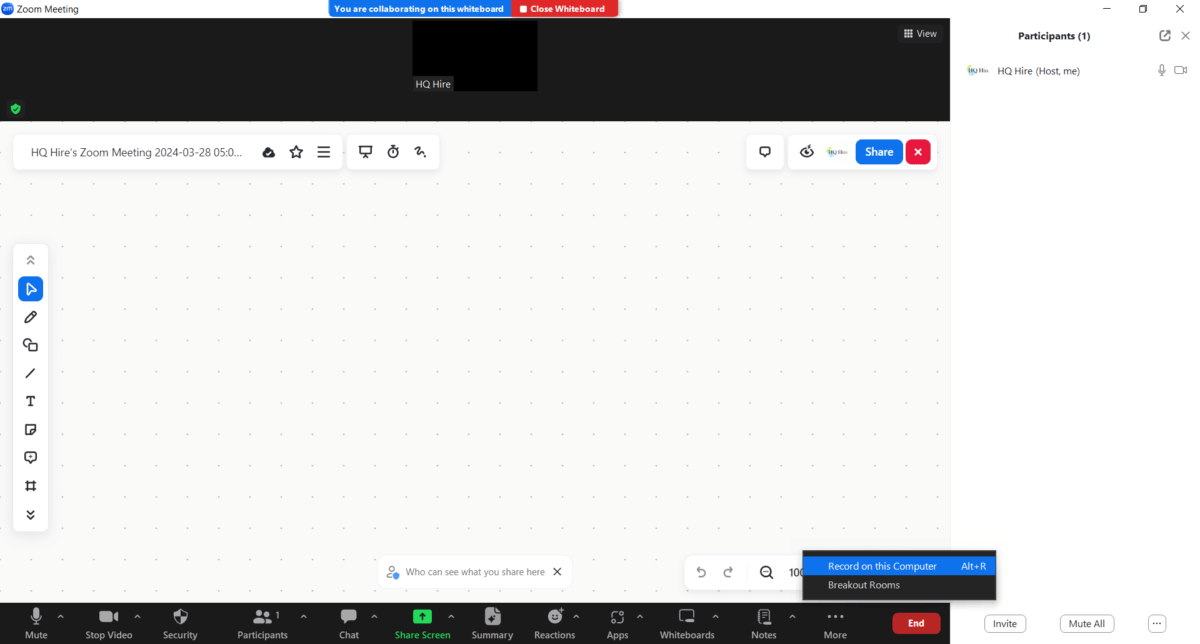
To record a meeting using Zoom, follow these steps:
- Start Meeting: Begin your Zoom meeting either by hosting a new meeting or joining an existing one.
- Initiate Recording: Once the meeting has started, click on the “Record” button located at the bottom of the Zoom meeting window. If cloud recording is enabled, a pop-up will appear confirming the recording has started.
- End Recording: To stop recording, click on the “Stop Recording” button. Another pop-up will confirm that the recording has ended.
- Access Recorded Meetings: After ending the meeting, Zoom will process the recording. You can access the recorded meeting in your Zoom account under the “Recordings” section.
Guide to Record Meeting in Webex
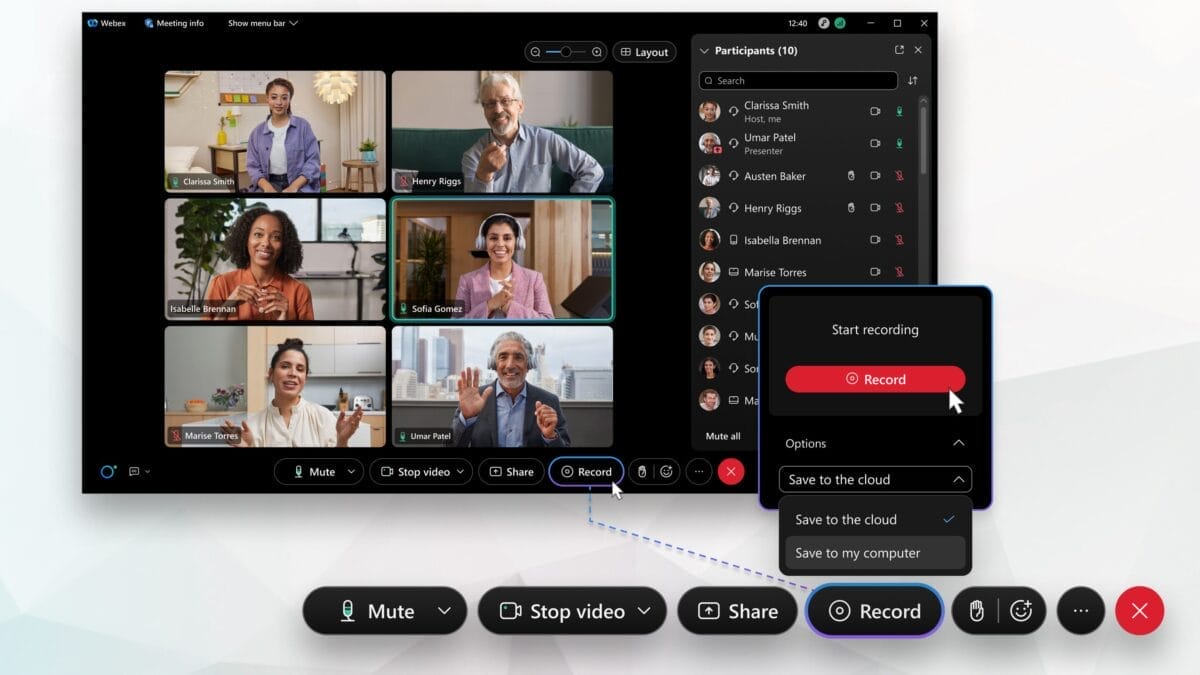
To record a meeting using Webex, follow these steps:
- Initiate Recording: As the host of the meeting, look for the “Record” button located at the bottom of the session controls.
- Start Recording: Click on the “Record” button to begin recording the meeting. A notification will indicate that the recording has started.
- End Recording: To stop recording, click on the “Record” button again. Another notification will confirm that the recording has ended.
- Access Recorded Meetings: After ending the meeting, you can access the recorded session by signing in to your User Hub. Navigate to Recordings and select Calendar > Completed to find the recorded meetings.
Guide to Recording Meeting with Zoho Meeting

To record a meeting using Zoho Meeting, follow these steps:
- Sign in to Zoho Meeting: Go to the Zoho Meeting website and sign in to your account. If you don’t have an account yet, you’ll need to sign up.
- Start or Join a Meeting: Once logged in, start or join the meeting you want to record.
- Initiate Recording: During the meeting, locate the recording option. Depending on the interface, you may find it in the meeting controls or settings.
- Select Recording Options: Choose the recording options such as recording with or without audio and video, depending on your preferences.
- Start Recording: Once you’ve selected the desired recording options, click on the “Start Recording” button to begin recording the meeting.
- End Recording: To stop recording, locate the “Stop Recording” button and click on it. This will end the recording session.
- Access Recorded Meetings: After the meeting ends, you can access the recorded session in your Zoho Meeting account under the recordings section.
Get your 100% Free online resume and get noticed by potential employers. Start out of the crowded space of millions of remote job seekers and find the remote job that you will enjoy and love.
